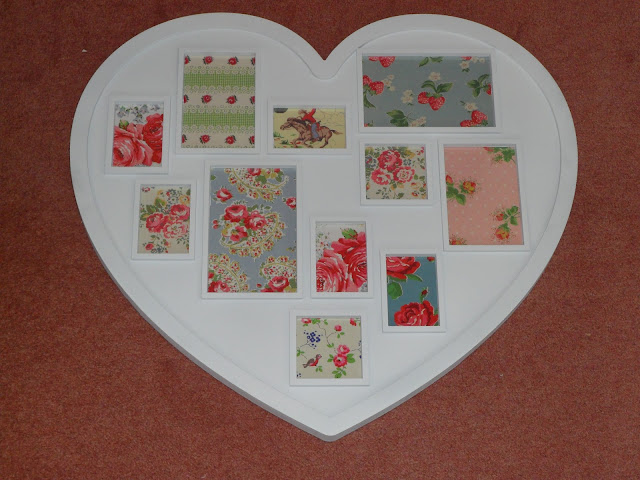
So today's post is going to be a little different. I thought today I would do a D.I.Y for you all! I recently brought a love heart photo frame from Next, although it came with lovely prints in it, I wanted to put my own spin on it. So in this post, I'm going to be telling you what you need and what to do!
 |
| Buy a photo frame! This is my chosen one, I love it! |
 |
| You will need blue tack for sticking the pictures on the template, scissors for cutting any pictures in half or for them to fit, a pencil to draw the outline and a rule to measure! |
 |
| You need some pictures to go inside the photo frame obviously. I chose Cath Kidston postcard prints, I love them! |
 |
| This piece of paper with the original prints was already in the photo frame. Very lucky and super easy to work with. |
 |
| This is the finished result, I just love it! |
You will need:
♥ Photo Frame
♥ Prints to put inside, either Cath Kidston postcards (like me), wallpaper prints, pictures from the internet or family and friend pictures.
♥ Scissors
♥ Blue Tack
♥ Ruler
♥ Pencil
How to create this photo frame:
♥ First of all buy your Photo frame. I chose this love heart one from Next, which was £16. It's a good value for money and has lots of room for pictures.
♥ Then choose photos to put inside. I chose Cath Kidston postcard prints as I thought it added a nice effect to it.
♥ Open up the photo frame and hopefully there should be some template pictures in it. Very lucky with this one as there was a full piece of paper with the prints on (see picture 4). This was very handy to see the exact size.
♥ However, if your not lucky enough to have templates, it's the ruler, scissors and pencil for you! You will need to measure your pictures and draw an outline on them to be able to cut them out! Once you've cut them out, just put them in the photo frame. Follow the next step if your not cutting them out.
♥ With the full template coming with the photo frame, I barely did any cutting. I think I cut about 3 out of 9 of the prints I was using. I cut 2 in half to use twice and the birdy/flowery print at the bottom out. I then positioned the prints on the template (some overlapped but that's fine!) and then stuck the pictures down on the template with blue tack, very simple, see picture 5 if you don't understand. Make sure they fit in the frame ok though, it's a bit of trial and error!
♥ Once there stuck down, place them in your photo frame.
♥ You should now have a lovely looking photo frame for your bedroom. You could even put it in the living room, kitchen, dining room, conservatory...wherever, it's very versatile!
I hope you found this useful. I realised I'm really not very good at explaining how I did it. Hopefully with the pictures and words it was ok! Let me know if you enjoyed, please request, because I need ideas and I love comments! Thanks for reading!
Byee!:)


No comments:
Post a Comment